Saturday, November 12, 2011

Mt Gede - Gede-Pangrango National Park, Java, Indonesia

It has been about a month since i have landed here in Singapore and having realized that there is not much i can do within this city, I decided to venture out into Indonesia. Indonesia has some wonderful volcanic peaks that are really enticing...

This hike has by far been the most spontaneous hike ever in my life.. There was no strong plan as has been the case with all my hikes in Canada and US. Madhav, my engg classmate, was in Jakarta and he offered to help me achieve my objective. So here I was, 5 days before the hike, without reservations, travel arrangements, park notfications. I decided to give it a shot with the following plan in mind.

Arrive Jakarta late friday night
Early Saturday morning - leave for trailhead.
Reach trailhead 10AM
Saturday night - Camp at Summit
Sunday evening return to Jakarta
Monday - Jakarta sight seeing
Tuesday morning - return flight to Singapore.

Not knowing what is to come, i assumed i would track to plan as i have in most of the hikes in the past. The journey starts with the first upset - Air Asia flight is delayed. I was able to reach Jakarta only by 130AM local time. On top of this, Madhav, who was supposed to drive me to trailhead was heavily drunk !! The only option was to postpone the hike by a day. We got up late Saturday morning and instead of heading to the trailhead early Sunday, we decided to go find a resort near by on saturday itself so that we can start hiking early on Sunday. It has been a while since i have travelled in a car in India-like environment and this ride was refreshingly pleasant.


Gudang Garam, the cigarette that is the starting point for most smokers in India


Snacks at traffic jams

We were beginning to see peaks at a distance

Madhav, my savior!

Agian, no reservations and we had no clue where we were going to stay. All we had was a 3G ipad which was put to optimal use. We found a resort called Bali Resort in Kota Bunga.

Late in the evening we had a nice full body genuine indonesian massage (it is not what you are thinking!) and I was all set for the hike next day.

We reached the national park at about 930AM and found the park to be locked. Then came a marine, who went in opened it from inside !!

Taman Nasional Gunung Gede Pangrango (Gede Pangrango National Park)

The twin volcanic peaks of Gede and Pangrango

The marine who helped us get in...

Apparently foreigners are mandated to hire a guide and a porter. You can negotiate if you can speak indonesian. But, since i had a ligament tear in my left shoulder i would not have been able to carry overnight camping gear anyways so we decided not to negotiate (Madhav knew a bit of Indonesian). We also met 3 dutch girls who were on a long vacation in Indonesia and were planning to do a 2hr hike on the same route - I offered to take them along till they wanted and they obliged. This way, even i would have company for the first 2 hrs..

Right before we started the hike

I asked the guide if we could stretch and cover both Gede and Pnagrango (Both are 9000ft+ and share the same trail half the way). He said that Pangrango is very risky in the rains and we should not attempt it. We were already into the wet season (Late Oct to Jan) and i too didnt want to take unwarranted risks. So we decided to wind up the hike with Gede only. The plan was to camp at Kadang Badak camp ground (7200Ft) and then do the last 2000ft early in the morning next day so as to witness sunrise at the summit.  

There are some beautiful spots a day hike if you dont have time and resources for a 2 day hike.

Small lake before the waterfall

Waterfall


Closer view of the waterfall

The hike until waterfall is relatively simple and offers some good views. The trail starts gaining some serious elevation progressively. There is a hot spring before Kadang badak camp ground. This is the last spot for day hikers because the trail is pretty steep beyond this point right until the summit.

Vapors coming out of the hot spring


Lots of branches to play with!!

Closer look at the hot spring

This hot spring crossing can be tricky and risky under heavy rains...

Vegetation is dense all through the hike

My guide and I took a crucial call to reduce the length of hike the next day. We decided to camp at the summit rather than at the base camp (Camp ground Kadang Badak). The were some disadvantages of doing so:

Water is available at Kadang Badak but not at the summit
The summit can be really cold and there would be no protection from rain
We might not have company even if we need help...

But, we decided to go ahead so that we could spend more time on the summit the next day. It was already raining and there was not much we could do anyways. 


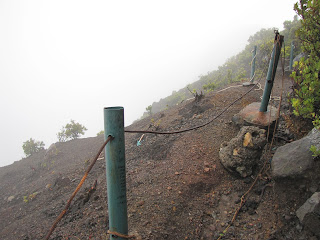
Gede summit when i reached - No visibility at all. The fall from here is right into the center of the volcano crater !

I am not used to somebody else setting up camp and cooking food for me on hikes. Even when we travel in a group, all of us contribute towards something. Here, I was pampered with luxury. The tent was setup when my guide and I reached. Kitchen was setup and boiled water was made avialable for dinner. I kept reminding myself that I must not get used to this - else, i would have trouble when i hike on my own !
Fortunately, it cleared up the next day - we still could not see the sun rise though. Apparently, we were the only ones camping at the summit

The views were outstanding and we could see as far as Jakarta. 

Gede Volcano Crater - it still spews smoke !

Pangrango visible in the background


Romy (Porter) and Isaf (Guide)


Video from the summit

The return hike was a much more relaxed downhill hike, through Suryakencana meadows to Gunung putri.


Suryakencana meadows

I could understand why they dont recommend hiking during rainy season

The view from Gunung Putri

Gede at the distance - From Gunung Putri

Just when i thought i had completed the hike, i realized that i still had a 31/2 hr journey back to Jakarta. Came back in a bus standing on one leg (there was only room for one leg - reminded me of mumbai local trains) for 2 hrs - luckily found a place to sit for the last hour or so.
After reaching Jakarta, i was taken for a ride by a taxi driver - paid him atleast double of what i should have paid. Anyways, all it does is adds more excitement to the trip !!

If you plan to make this hike, here is some information you will find useful:

How to get there:
There are multiple entrances to the park. Cibodas is the most popular entrance - There are frequent buses from Jakarta. I started the hike from Cibodas and exited at Gunung Putri

How much:
Jakarta - Cibodas - 15000-25000 Indonesian Rupees - 3.5 hrs
Porter - atleast 400,000 Indonesian rupees
Guide - atleast 400,000 Indonesian rupees
Rentals - all inclusive ~150,000 (Sleeping bag, tent, kitchen)

This being my first hike in this region, this will always be special !! Currently looking at some more interesting ones both in Indonesia and Malaysia.

Up next: Kota Kinabulu (Malaysia) in Feb/Mar


Sunday, October 23, 2011

Mt Albert - Gaspesie National Park


The 'Chic-Chocs' range has the highest mountains in Quebec. Gaspesie National Park has two of the highest peaks in the region - Mt Jacques Cartier and Mt Albert. Both of these extend well over 1000m and have some really challenging hikes. The trails are physically hard but not technically risky - Believe me, it is pure hard work completing circuits on either of these. These trails are part of the International Apalachian trail (International counterpart of the American Apalachian trail)

Gaspesie National Park is ~750Kms from Montreal and would easily take about 10 hrs by Car and ~12hrs by public transit. As I cut loose on exploration, I have increasingly felt handicapped without a car - It has seriously limited my movement. Nevertheless, I have not missed those with Public transit access !!

Montreal(A) to Gaspesie National Park(B)

I prepared an ambitious solo plan which involved ~1500Kms of bus travel, 17+kms of hiking and a short sleep at a small town near Gaspesie - All in less than 48hrs!! I have a better feel of my stamina (or lack of it!) these days, especially after this busy summer. I am also beginning to like solo hikes !

Here was the plan:

9 AM Saturday: Leave Montreal
9 PM Saturday: Arrive Sainte Anne Des Monts (Small town ~40kms from Gaspesie National Park)
8AM Sunday: Shuttle to Gaspesie National Park
930AM Sunday: Trail head - Mt Albert
5PM Sunday: Shuttle back to Sainte Anne Des Monts
8PM Sunday: Bus to Montreal
8AM Monday: Reach Montreal

The entire itinerary hinged on two key public transits - Bus to Ste Anne Des Monts & Once a day shuttle to Gaspesie National Park. I had to re-hash the whole itinerary when i figured out that the shuttle runs only once a day !

I reach Ste Anne Des Monts on time and checked in at the hotel (Gite La P'tite Falaise) - the hospitality was amazing. It is a home converted into a hotel and it felt like family. Just that we had call an interpreter to converse !! My french is limited to basic greetings and their English was even more limited.. But, finally we figured out a unique way to interact - Google translate !!! I was treated like a guest in their family and it felt great. It was a great start to the trip...

The next morning, I was offered a nice, royal breakfast - This was going to be the biggest meal of the day. It was time to bid adieu - I have not felt bad leaving any other hotel ever in my life, but this one was special.


Ste Anne Des Monts
After finishing registration formalities, I was ready to start my hike. I had met a park official, while I was travelling to the park, who recommended me to do the entire circuit (~17Kms) instead of just doing the summit of Mt Albert (~10+Kms). My only worry was that i had to return on time for the 5PM shuttle - If i missed it, I would be stranded in the middle of the park without a camp site booking, tent and sleeping bag. That was a scary picture !!

But then, I decided to take that risk and started the full circuit.

Near the trail head
There were some amazing views right from the beginning. This range is very similar, in terms of vegetation, to Trans Canada trail that I completed about two weeks back. Trans Canada trail lies to the west of St Lawrence river whereas these mountains are on the east.
As i was gaining elevation, there were some beautiful viewpoints all across the trail. Here are some of the pics:


The summit

I met a 50+ hiker towards the latter half of the trail. He and his 80yr old father do this hike each year religiously and since his father had a medical checkup this year, he handed over the baton to his son. One quality of North Americans that amazes me is their commitment to fitness - This guy (50yr old son) has been hiking for a period that easily exceeds my age. One of the reasons that keep me going is people like him who inspire me each and every time i have hiked in North America.


I admire his commitment

The view from summit was outstanding - you can see the entire range on a clear day. Luckily for me, it was not cloudy enough and i got to see the whole range of Chic chocs.
The view from Summit (1)

The view from Summit (2)

The summit is as flat as it can get.. Since this is a feeding ground of Caribou, they have placed a wooden platform all along the summit so as to not disturb the grass below. We are not supposed to get off the platform - this was respected by everybody.


The return trail has a long patch of rocky stretch - takes a serious toll on your ankles.


 There is a beautiful river crossing (on a bridge) too.


There is a nice lake too - Apparently, this looks really beautiful during winter... You will find its pictures in the visitors center.


All in all, a beautiful hike which had challenges on all fronts - right from travel to communication to the actual hike itself.. Thoroughly enjoyed it.

As it turns out, this one was my last hike in North America. I would start hiking the tropical forests & peaks of South Asia as soon as i get settled down in Singapore.

Bye Bye North America !!

Monday, September 5, 2011

Trans Canada Trail - St Tite Des Caps to Anse Aux Vaches

Hiking the 'Trans Canada Trail' seems to have become an annual ritual... Also, this is the same one which i attempted earlier during the year but had to return empty handed because of not knowing French (Why you should know French !)

Last year, around the same time, Rias and I did a shorter hike on the same trail (2010 Trans Canada Trail Hike)

This time around, I decided to do it solo - this one being my first solo overnight hike. Last year we had hiked till Camp Gribane but i wanted to stretch myself this time around. So, I decided to go till Anse Aux Vaches (Google translates it to 'Handle the cows' !) which would be a 35km round trip from St Tite Des Caps.

This segment of Trans Canada trail is mostly through dense vegetation and offers some spectacular views of St Lawrence river. Although the elevation gain is not significant, the frequent uphill-downhill stretches makes it challenging.

DAY 1:

Montreal - Quebec (Many operators ply this route)
Quebec - St Tite Des Caps (Public transit -> Intercar)

The forecast predicted rains for the evening so I had to reach Anse Aux Vaches and setup tent before it starts pouring down. The hike between St Tite Des Caps and Camp Gribane (~10Km) is frequented by many day hikers. However, the stretch between Gribane and Anse Aux Vaches is totally deserted - There were spider webs across the trail, which clearly meant nobody has gone through that segment for quite some time.

'Stove not working !'

I managed to complete the 17km strech in about 7hrs. Reached the campsite before six in the evening. All i had since morning was a muffin at Quebec bus station and nuts during the hike. I was looking up for a good dinner before I called it a day. Thats when my stove pump refused to work - after trying to fix it for an hour, i quit. I had no other option but to have a couple of bars and go to sleep.

DAY 2:

Luckily for me, breakfast did not require boiling water. Else, it could have easily been one of the worst hikes ever ! I had a nice breakfast, which would possibly be the only meal before dinner. I had to start really early at 5AM to make sure i reach back on time for the 1 PM bus. I made good progress - also managed to stop at view points and still was back in time. 

'Bus full...'  

Apparently, there was more excitement left ! It is a first come first serve ticket issued on this route - so, if the bus is already full, you just have to wait for the next one. That is exactly what happened with me but i was in no mood to wait for 5 hrs for the next bus. So, i asked the driver if i could just stand in the aisle till Quebec - Thankfully, he agreed and I was tracking to plan again !

Unfortunately, i forgot to take a camera along - all i had with me was a primitive VGA camera on my cell phone, which also happens to be primitive !!.


You will find some good pictures of the same trail in my previous blog  (2010 Trans Canada Trail Hike)

Up next: Chic-Chocs Mountain range - Mt Albert in Gaspesie National Park.


Sunday, August 7, 2011

Into the Arctic - Auyuittuq National Park - Tips for the first time hiker


All throughout my research for this hike, I have not been able to find in depth advice/tips for the first time hiker to Auyuittuq. So, here is a compilation of our mistakes (& learnings) and things that we did right ! You may want to have a look at my gear list (Auyuittuq List) before going through this article.

Though this is meant for the first time hiker to Auyuittuq, even those who have been to Auyuittuq might be able to pick up a point or two.

Travel

What we did right:

Flight cancellations are common due to unpredictable weather. Allow for one day between transits - we saw a group stranded because one of their flights was cancelled and they were at risk of missing their connecting flight. You can avoid this mess by planning better...

What we didn't:

Our planning was just about perfect - we just had to spend one extra day at Pangnirtung because we wound up earlier than expected due to bad weather.

Tent

Tent is the most crucial element of your trip. Your trip can easily be a misadventure if you don't have the right tent. It should be able to face extreme elements !

What we did right:
  • Wind : Make sure your tent is able to withstand heavy gusts of wind (30-35kmph at least). Add extra anchors even if it isn't windy when you setup the tent.
  • Water : You cannot afford to let water in at any cost - the risk of hypothermia is quite high in these environments. Make sure you always use a tarp below the tent. Check out the waterproofness rating. I own the 2 person MSR Hubba Hubba and did not face any issues even in extreme rain conditions we had. No condensation issues despite almost six nights of continuous rain (because of the mesh screen inside which provides very good ventilation)!
  • Tent Location : There are no designated campsites - although you may certainly be able to find some traces of previous campers. Avoid exposed areas. Don't be too close to bed of mountains (rock falls are common) and don't be too close to the river either. We saw some tent sites (traces of previous campers) go under water due to heavy rains. Avoid water streams (even those without water - you never know !)
  • Tent Positioning: While setting up tent, determine wind direction and expose least area to wind. Try to expose corners to wind - this will deflect wind and your tent will not take a hit. This precaution may be extremely helpful if wind direction doesn't change. If the wind direction does keep changing, you anyways have no other better option !!
What we didn't:

Nothing !! - We were bang on. Not even a single drop of water inside tent despite 6 nights of rain and one night of storm. 

Stove, Food and Fuel

What we did right: 

Carry 2 days of extra food - you might be stranded at river crossings and may have to extend your trip.
Carry a backup stove - the first emergency shelter is 20+Kms
Carry enough fuel - Again, don't depend on emergency caches ! About ~100 ml per person per day. This is just an average - go by this if you don't have any prior experience. We managed with ~1L for 2 people for a trip of 8 days. We cooked twice a day - but only boiled water as we had ready-to-eat stuff. We carried 2 litres...

Self sufficiency is the best option for this trip - Don't depend on emergency shelters but know what is available there.

What we didn't

Read instructions thorougly on packs before you leave. Some food items (e.g. scrambled eggs) might need additional utensils. We carried 3-4 extra packs which we could not use. Easily avoidable !
This applies only if you intend to carry ready to eat items which require only boiling water. If you are an experienced hiking cook, you can ignore this...

River crossings

What we did right:

We carried waterblocker sealskinz socks. It worked decently well - although we would have liked to perform better. We did have water inside our socks... This is possibly the best option around.

What we didn't:

Get water shoes.

We used sandals (Merell Waterpro) to cross rivers. This was not a bright option. Your feet is exposed to cold water and you feel that chillness for quite some time. Small pieces of rock get stuck frequently- it was irritating to remove them each time we crossed a river stream.

Be prepared to walk long distances on your water shoes. We had heavy rain and there were numerous new streams created on our return. I almost walked 10-15 kms on my sandals - it takes a toll on your ankles...

Good strong hiking poles

Lighter isn't always better ! 
We opted for ultra light poles from Black Diamond - very expensive and they do not serve the purpose. My poles broke off (yes, thats right !) during a river crossing (luckily, on our return trip). I did the remaining crossings with one pole !!
Get something which is sturdy.

Satellite Phone

What we did right:

Though this is optional, we did carry one. Was very useful - we got the weather forecast and our decision to cut short the trip was based on this forecast. The forecast was indeed very accurate. We were not stranded and did not need rescue (unlike all others who were rescued by helicopters. We were the last ones to come out of the park by themselves) just because we carried a satellite phone.

And of course, you can keep your loved ones informed - saves some unnecesary tense moments for them.

Iridium satellite phones work well in the arctic. We carried 9555 - Latest, lightest and sturdy. Worked as sweet as melted chocolate !!

Don't be ashamed to ask

What we did right:

We always asked about conditions ahead from hikers who were crossing us in the opposite direction (There were not many and there will never be many !! ). It helps tremendously to determine water levels in rivers beforehand. Else, you might have to camp right next to the river to figure out the right time to cross it - you might end up putting up tent in a risky spot.


Others

These apply to any hike in general.
Backpack: Get a comfortable backpack - avoid first use in the arctic. Prefer tried and tested ones.
Map: Get a chrismar map. This is the only map available - very helpful. You can order it online (www.chrismar.com).
Sleeping bag rating: Normally your sleeping bag should be rated 10 degrees lower than the lowest temperature you can expect in a trip. We had a comfortable trip in July with a -7 Deg C rated sleeping bag.
Sleeping pad: Provides insulation and comfort
Hiking boots: Try to get boots that go over the ankle - you don't have to change shoes often for river crossings. The hike is not technically risky. Any type is OK but waterproofing (goretex) is must.
Compass: We carried one but never used it. You may need it in the northern segment of the pass where there is no fixed trail.
Gaiters: Optional but may be helpful. You can skip it...
Energy bars/gels, hydration pack, water purifier tablets (we carried but never used it! You cannot get purer water on this planet - Make sure you collect water from side streams and not the river. You may need purifiers if you use river water) and layered clothing.


Hope this helps - All the best !

Feel free to contact me (by leaving a comment) if you need additional information - I would be glad to assist...

Friday, August 5, 2011

Into the arctic - Auyuittuq National Park - Video Blog


The storyline is self explanatory and I do not want to spoil the suspense with a brief write-up here.  

This is my first attempt at video blogging and hence the effort might seem amateurish. But, it certainly looks like a decent start !!

Just a few words of caution:

1. Views and opinions expressed are of an amateur hiker from Asia (S/P). Experienced North American hikers, who have done Auyuittuq, have full rights to disagree.

2. I would recommend you to watch both videos together (back-2-back) to get a feel of the whole story - if you don't have the time (~10 mins), please wait until you have it. However, if you don't have time and will never have time - then please feel free to watch as you wish.

3. This video blog does NOT claim to be an Auyuittuq guide - Events that occured were one of those rare extremes which you may not face during a regular Auyuittuq hike. I would be following this up with a detailed guide for first time hikers to Auyuittuq.

PART 1:


PART 2:


Enjoy - Detailed writeup (with more pics) coming soon. !!


Tuesday, July 19, 2011

Grand Canyon hike - South Rim to North Rim


As I look back at this rim-to-rim hike of  grand canyon, I realize that this one is indeed going to be very special. And, a rim-to-rim hike is possibly the only way one can experience this magnificent masterpiece in its entirety.


Grand Canyon and its history:

The sheer size and age of these structures is unbelievable. The majestic grand canyon(s) gave us a glimpse of the insignificance of human race in the larger scheme of things. Here is a brief history:

Grand Canyon lies in Colorado plateau, which was uplifted by collision of tectonic plates. Colorado river and its smaller streams have  been cutting through layers of rocks for millions of years resulting in the formation of Grand Canyon. The age of Grand Canyon is a hot topic for debate but Wiki states that Colorado river made its way through the plateau at least 17 million years ago. Since then, Colorado river has been eroding layers of rock to result in the current structure of Grand Canyon.

The Hike:

Hiking 21 miles (33Kms) in temperatures of 40-45 degree celsius is certainly not a casual hike.  Going down ~4800 ft and coming up ~5800 ft is a daunting task, to say the least. The hike is not technically risky as such but the extremely hot weather makes it a very challenging hike.

DAY 1: Rendezvous at Las Vegas

Five of us flew in from different part of North America to Las Vegas - Ali from Raleigh, Ady from LA, Pushkar & Deepak from San Jose and I flew in from Montreal. Luckily for us, we didn't face any flight delays like the colorado hike last year (http://athmagyaan.blogspot.com/2010/08/colorado-trekkers-paradise.html)

After spending the day at a hotel in Las Vegas, we left for the campground just outside Grand Canyon National park. Just before entering the campground, we were stopped by a police officer who informed us that the campround was full. This would have been a major upset to our plan as there is hardly any other spot available nearby for camping. But, luckily for us, we had reserved a campsite and were allowed to enter on providing reservation details. I guess the officer was bluffing to prevent gate crashers from entering the campground.

We reached our campsite around midnight and were ready for a short sleep as we had an early start the next day.

DAY 2: South Rim (South Kaibab Trailhead) to Cottonwood campground  via Phantom ranch (14 miles/22.4 Kms)

After just three hours of sleep we set off on this 21 mile rim-to-rim hike. We reached just on time for the 415AM shuttle which took us till South Kaibab trailhead. Here is a view of how it looked just after we started:

 
Grand Canyon at South Rim

Grand Canyon at South Rim (Source: Ali)


The first 7 miles were relatively easy but were taking a toll on our knees. This portion of hike is a steep downhill stretch all throughout until Phantom Ranch. As visibility was getting better, we had the opportunity to witness this majestic beauty.


On the way down to Phantom Ranch


Ady (Left) and Pushkar


Colorado river

We reached Phantom Ranch (7 miles from Trailhead) at around 930 - about five hours after we started. We were beginning to feel the heat now. The only direction temperature was moving was upwards.


Water is all you need !
 

Ady's turn!


And then Pushkar !


That's where we were warned by a ranger. We were about to start hiking the next 7 miles at 10AM in temperatures of over 40C. It seems there have been a couple of rescues during the past two days in the same stretch. Hikers seemed to have under-estimated the heat. We were told to wait till 4PM to start the hike. But then, without adequate sleep, next day's hike would have been tough. We decide to proceed albeit with all precautions given by the ranger (which also included getting down in water wherever possible). 

As we were hiking through the flat patch between Phantom Ranch and Cottonwood camp, we realised that we had not made the right move - but, we had no other alternative. We should have either started earlier or hiked the first 7 miles faster to beat the heat. 

One of those water breaks!
 
 
On the flat open stretch which made us stretch !


We got exhausted but still made it to Cottonwood camp in decent shape and with lots of time at hand. Ali and Deepak, who were quite ahead of us, reached cottonwood before 10AM thereby escaping the heat. Aditya, Pushkar and I reached at around 4PM.

There was nice little pool at Cottonwood camp much to the relief of all of us.


One can easily guess the temperature of water from their expressions !


After spending sometime there, we had  an early dinner and went to bed at around 830. That's when we realized that we had carried our sleeping bags for no reason. It was really hot - some people didn't even bother to get their tents. After this tiring day, a good sleep was very essential for next day's hike and we did manage to have that.

DAY 3: Cottonwood Campground to North Rim (7 miles/11.2 Km)


Next day, we started hiking the last 7 mile stretch at about 330AM. This stretch had some lovely views as we were gaining elevation. These 7 miles were the steepest of the lot but we could do it without getting completely exhausted as we were in the shade most of the time.


Time for reflection !


Pushkar finds a cozy(??) place for a quick nap !


Once at the top of North rim, we had all the time in the world.


At the North Rim - Victory at last !


We had one full to day to look around before we take the shuttle back to South rim. We got some good pictures there.


Pushkar tracing the trail - South rim is at the background at this pic - that's where we had started !


One of those rare pictures with all crazy buggers !


DAY 4: Return to Las Vegas


Early next day, we took the transcanyon shuttle to South rim. We spent some time at the South rim before starting our journey back to Vegas.


South rim too was good - We didn't notice it as we had started before sunrise !
 
We made a quick stop at Hoover dam which lies on the way to Vegas. An engineering marvel, hoover dam was built in the 1930s - it is tough to imagine that something so big and complex was accomplished such a long time back.


We reach the airport on time for our flights and look back at a very satisfying hike - one that will linger in our memories for quite some time. Also, this one being my last hike in the US before i head back to Asia, it was indeed special.

Images are courtesy of Ady & Pushkar (unless stated otherwise)